Most people wouldn't think I was very into the "goth" or "steampunk" scenes. The truth is that I often really love some of the designs those that are come up with. Even though i really like them, I haven't found many occassions to make anything for myself. I did make an awesome romantic skull patch for giggles one day and some of the looks I got were quite humorous. I don't care - I like it. I got the design from www.urbanthreads.com - they have THE MOST AWESOME non traditional designs for embroidery & applique out there!
Anyways, back to the point of this post. We received an invitation to go to one of my hubby's friends' wedding & guess what???? The invitation had skulls on it! Oh, how my mind wandered! I was SO excited because this was my chance to do some sort of off the wall gift that would truly be enjoyed by the recipients! I considered several options, but decided on a skeleton bride and groom design with the date of the wedding to be used on a wall hanging. I stitched the design out on linen, stretched it over a canvas, attached a ribbon, and glued on the backing - Voila! I was very pleased with the way this turned out & from what I hear, the recipients enjoyed it as well.
Showing posts with label embroidery. Show all posts
Wednesday, August 1, 2012
Sunday, June 10, 2012
Rainy Weekend Fun!
It was a miserable weekend for doing outside activities with all the rain and dreary weather, so I got to play in the craft room! Yippee!
I was pretty productive for not working at an insanely crazy pace. I embroidered some little outfits for sweet Ensley, made a pair of patriotic shirts for a friend at work, and finished my June challenge entry. I'm working on some charms for another long term project too. I'm on such a roll, I really wish I didn't have to go to work this week!
![]() |
| I used 2 mini filled designs from Applique Momma to embellish the top of this little romper. |
![]() |
| This girly octopus from Applique Momma girlied up this blue bubble. |
![]() |
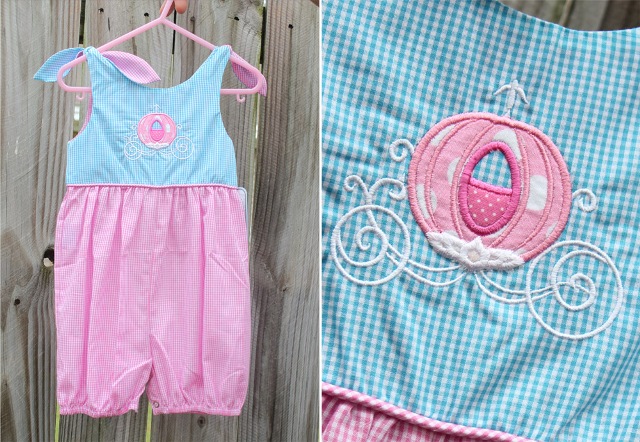
| The princess coach came from Frou Frou by Heather Sue. I love this one & use it often! |
![]() |
| What better way to brighten up a dreary day than to do a fun summer sunshiny beach bag! This design came from Luna Stitches. |
![]() |
| I used the Old Glory Alphabet & Preppy Monogram Font from Hang to Dry Applique for this Grandpa - Grandson set! |
Thursday, March 1, 2012
My First Embroidered Onesie
Ever wonder why all those ridiculously cute embroidered/appliqued onesies cost so much? Well let me tell you - they are a pain in the tookus! What makes them so adorable makes them scary hard on a single needle embroidery machine! They are so small so the embroidery field is also very small. The hard part is keeping the bottom, top, and excess sides out of the way of the needle.
I made an appliqued onesie for a friend one time before and used a cheap pack of Gerber onesies from Walmart I believe. Even though it was a slightly larger size, it was still hard because the material was quite thin and easily tore. It made for a cute gift, but it was definitely not the best quality.
When another friend asked me to make an itsy bitsy teenie weenie 3-6 month size onesie, I was quite scared that i'd spend a fortune messing try and try up. I found the perfect design at http://www.8pawsandaclaw.com/. I have learned a good bit since my previous attempt and heard a tip where clothespins are supposed to help. What the heck right? I tried them and I wouldn't say it was a perfect solution, but it did help tremendously! I was able to embroider the design on the shirt & if I hadn't had a thread issue at the very end, the entire process would have been MUCH more pleasant than I was anticipating. It was still nerve racking & a project you have to babysit on the machine, but well worth the time and effort in the end :)
I made an appliqued onesie for a friend one time before and used a cheap pack of Gerber onesies from Walmart I believe. Even though it was a slightly larger size, it was still hard because the material was quite thin and easily tore. It made for a cute gift, but it was definitely not the best quality.
When another friend asked me to make an itsy bitsy teenie weenie 3-6 month size onesie, I was quite scared that i'd spend a fortune messing try and try up. I found the perfect design at http://www.8pawsandaclaw.com/. I have learned a good bit since my previous attempt and heard a tip where clothespins are supposed to help. What the heck right? I tried them and I wouldn't say it was a perfect solution, but it did help tremendously! I was able to embroider the design on the shirt & if I hadn't had a thread issue at the very end, the entire process would have been MUCH more pleasant than I was anticipating. It was still nerve racking & a project you have to babysit on the machine, but well worth the time and effort in the end :)
Wednesday, February 29, 2012
French Bulletin Board Tutorial
I’ve loved these boards for years! I don’t know why I never thought of making one before. I mean, they don’t require an embroidery machine much less a sewing machine, but it wasn’t until I got my embroidery machine that I buckled down and decided to make one. I did very little research to determine how to make them, so please feel free to adapt these instructions in anyway you think might work better for your project – this is just what works best for me!
Materials:
- 1 canvas (I used a 16x20 that came in a bulk package of 5 from Michael’s)
- 1 piece of desired fabric at least 2 inches bigger in both directions of your canvas – so if you use a 16x20, you need at least an 18x22 piece of fabric (I usually use a fat quarter J)
- Fabric & embroidery thread for the appliqué/monogram if desired
- 1 piece of light-medium weight quilting batting the same size as your fabric
- Spray adhesive
- Staple gun with staples
- ¼ inch or narrower ribbon in a color that coordinates with your fabric
- Buttons or brads for where the ribbon meets
- Sewing needle & thread if buttons are used
- Ribbon or cording the depth of the canvas to “frame” the canvas (optional)
- Hot glue gun & glue to attach the ribbon “frame”
Step One:
If your fabric isn’t already cut to the size needed, I usually just lay the canvas down on top of the fabric and cut the fabric out with at least an inch extra on each side of the canvas. Once I have my fabric cut, I go ahead and do my appliqué or monogram on my embroidery machine at this point.
Step Two
I use a little spray adhesive to put the batting onto the board. Smooth it out so there aren’t any lumps and bumps. Add a little more spray adhesive and the put the fabric on top. You may not need the adhesive, but it helps me keep the monogram in the center where I want it. If I didn’t have a specific center or patterned design, I wouldn’t worry about it J
Use your staple gun around the outer edges to attach the fabric & batting to the board. Just be careful and don’t shoot yourself in the finger with a staple! OUCH!
Step Three
Once the fabric is attached, it’s time to place your ribbon. Personally, I like to make the ribbon blend in with the fabric. In this case, the fabric had a nice pattern to it that I could follow with my ribbon to make sure it was nice and straight.
You can place the ribbons however you’d like, just remember that if the spaces in between are too small, you won’t be able to fit larger items on the board, but if they are too big, you might lose some of the smaller items. I usually cut strips of ribbon long enough to stretch the entire diagonal length of the board and then place them on the board to see how I like it before I secure anything. Once I have it placed, I sew a button covering where the ribbons meet. I also staple the ribbon on the sides or around the back to make sure they are good and secure.
Step 4
So your board is looking pretty good now right? You could leave it alone here, but I like to give it a little more polished look and add ribbon or cording around the edges. I just use hot glue to attach it but there may be something better out there to use. Feel free to share any tips you have!
Completely optional, slightly anal step: I decided I didn’t like the back of my board (because you know the wall is going to complain if it has to look at an ugly back) so I also hot glued little buttons to cover the knots where I’d sewn the buttons on the front. If you choose to do this, watch out for the hot glue that comes thru the little holes on the buttons J
If you'd rather purchase one customized just for you, visit my Etsy shop and I'll make one for you!
If you use this tutorial, I'd love to see pics of your finished projects! Thanks so much!
Subscribe to:
Posts (Atom)