Showing posts with label cake. Show all posts

Thursday, April 26, 2012

Cake with the Daring Little Separator

My most recent cake reminds me that there is an awful lot of editing that goes on behind the scenes before you ever see a television show.  Let’s give you a little background before I show you the wedding cake from somewhere south and red and very, very hot where people have little horns and carry pitchforks.

I’m sure at some point in your life you’ve watched one of the numerous cake decorating shows that are on the Food Network or TLC channels. I’ve watched several of them – my favorites are the Food Network challenges. I was lucky enough to get the opportunity to take a class from the wonderful Kaysie Lackey! She is one of THE MOST energetic and creative people I’ve ever met! The class was so much fun & I was super shocked that she taught us to put together a cake (real cake – not just a cake dummy) that made it all the way home from Nashville, TN – A 5 HOUR DRIVE!!!!  Here’s a picture of the cake before we left:


Kaysie & Casey - KC squared!


And here’s a picture after it’d been traveling for 5 hours in the car.


Totally amazing that it survived right? I thought so.

So, this brings me to the cake from H. E. Double Hockey Sticks. All of my wedding cakes up to this point have been tiers stacked on top of tiers. Ever since I went to the crazy teapot cake in Nashville, I’ve wanted to step up my game as far as cake design goes. I’d gotten very tired of doing the same ole thing, but that’s what everyone seemed to want. FINALLY, I have a sweet friend that’s getting married and said I could do what I wanted.

This is my chance! I can do finally do something out of the ordinary. YAY!!!! Or so I thought to begin with… The cake design is fairly simple. Round cake, ribbon roses, and buttercream piping. The part that gets tricky is the 6x3 cake dummy covered in fondant that separates the center tiers. I really think that if I had not insisted on stacking the entire cake at home before I left, I wouldn’t have had a problem. They do it on TV all the time, so why wouldn’t it work for me?

Purple and Black Round Wedding with Separator & Ribbon Roses


The car ride was MURDER! I thought it would be a good idea for someone to sit in the back of the car with it just in case it tried to topple. I didn’t make it to the end of my short little street before I was hyperventilating in tears and made my hubby pull over. He graciously sat squished up in the back with it and let me drive. I think I held my breath the entire way there. Just before we pulled into the parking lot, we hit an unexpected BUMP & my hubby’s hand smashed a small part of the bead border. No worries though – that’s what the emergency kit in the front seat is for. We got it set up, I fixed the border only to realize that the cake is sitting on a table that is slightly crooked L I guess it could have been my cake, but all the tiers would have had to be crooked in order for it to be the cake I’d think. All the tiers seemed to line up to me. I guess it doesn’t matter though – the bride said she loved it & I’m fairly certain she would have told me if she didn’t like it. I am just thankful it made it there in one piece and she was pleased.

If I ever do another similar cake, I will just have to put on my big girl britches and stack it in front of people. I’m thinking I won’t do another one of these though. I don’t know if I nerves could take reliving the memory of this one again...
Closeup of some details (I know this looks crooked because of the camera angle - LOL)

Tuesday, April 17, 2012

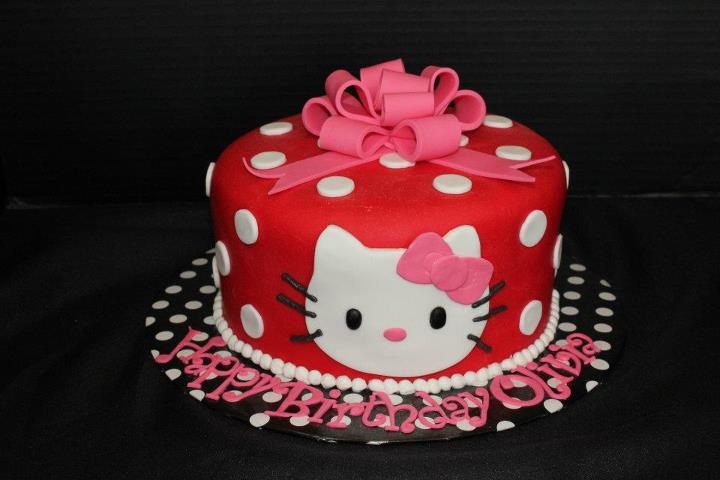
More Hello Kitty Cakes


So apparently Hello Kitty is quite popular... I think it might be my most popular request. My most recent HK cake was so popular it deserved its own post :) That one is probably my all time favorite HK cake, but these are pretty cute too. You can also tell that I've come a LONG way in my decorating abilities. Sometimes it's fun to go back and look at the cakes you thought were so cute at the time, even though now I'm sometimes disgusted in what I'd done before. But - does it really matter as long as the precious little recipients like them?


Simple all fondant decor with buttercream icing underneath 
Another simple round cake covered in fondant - I like the bow on the first one like this better, but i LOVE the name up in the air on this one :o)
My favorite tiered version! Buttercream base with all fondant decor (HK, polka dots, stripes, name & flowers)
The super sweet recipient of the Shamrock Hello Kitty cake below just about brought tears to my eyes. I was having a bad day when I got the sweetest message from her mother. She said that the cake was exactly what she wanted and that it was her favorite part of her party. She wanted balloons, shamrocks & HK on her cake. This story is what makes me love to do these and what made it so hard to decide to stop.

Shamrock Hello Kitty - Buttercream base with fondant accents


Tiered buttercream with fondant accents and Hello Kitty candle

Simple carved shape with buttercream decoration
(Told ya you could see the difference a couple of years can make in your decorating ability! - newest on top obviously!)

Wednesday, April 11, 2012

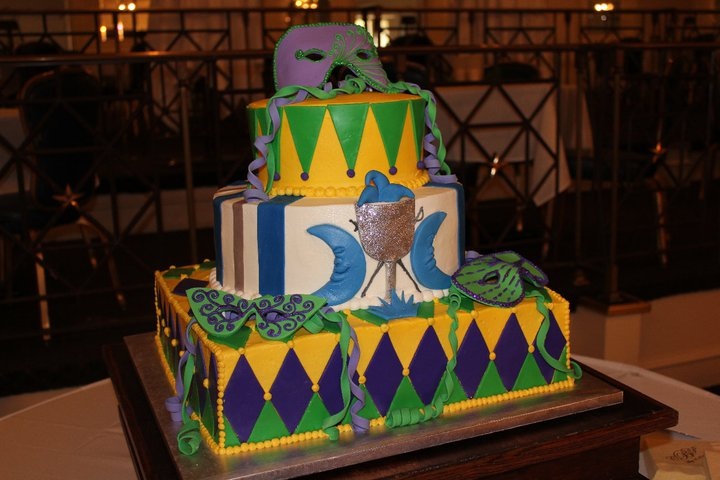
Mardi Gras Groom's Cake

This has got to be my absolute favorite groom’s cake I’ve ever done! I love Mardi Gras and all the fun that’s associated with it. When I was asked to do this one, I knew I just had to figure out a way to make it happen!


As with most of my cakes, the majority of this was buttercream icing. I made the masks out of homemade gumpaste following the Nicholas Lodge recipe you can find here. This was my first attempt at making my own gumpaste & I have to say I was extremely impressed with the results. The masks felt almost as smooth as porcelain. I rolled the gumpaste out, cut out the shape freehand & let them dry on a mask form I found at Michael’s. For the silver stripes, I used edible image “paper” and airbrushed it silver, let it dry, and then cut strips with an Xacto knife. For the extra bling here and there, I used Disco Dust. So much FUN!!!!


I was so excited with how this one turned out! Can you tell???

Damask & Stenciled Bridal Cakes

I was so scared when I ordered my first set of cake stencils. In fact, it took me about 3 months before I got up enough nerve to use them. The first attempt wasn’t all that pretty. (I’m not even sure I took a picture of it – I couldn’t find it when I was looking. If I come across one, I will add it here) I simply had to get better though! I had a bride that knew exactly what she wanted & I just HAD to make it happen for her special day!


Another friend was throwing a bridal shower for a friend of hers & asked me to do the cake. She wanted me to try the stenciling out again because she just knew I could do it! So I tried it. This time I tried a different stencil. This one turned out better, but I learned that I need my hubby home to help me hold the stencils when dealing with a round cake. I know it isn’t perfect, but I absolutely loved the sweetness of this little cake.


So after having a successful attempt, I felt so much better about doing the wedding cake. I stenciled on alternating tiers of this 4 tier square beauty. I used black royal icing for the stenciling and satin ribbon on the non-stenciled tiers. The super talented bride and groom made the gorgeous cake stand along with the cake topper. I loved the set up of this cake table! So elegant! A pretty table setting does wonders for an already pretty cake – even helps out ugly cakes too!


After doing these cakes, I started getting asked for more stenciled cakes. The next opportunity I had to use it was for one of my very best friends! She was throwing a wedding shower for a super sweet girl and she wanted a cake with some WOW factor. This is what I came up with. I used the “princess damask” stencil again around the bottom tier, tiny black piped dots on the top 2 tiers, gumpaste flowers (first attempt at anemones – without the stamens), and black satin ribbon around the base of each tier. I have to say, I’m not a pink person, but I absolutely loved this color combination on this cake. I thought it turned out so delicate and striking all at the same time.


Last month, I was honored to make a wedding cake that just screamed SPRING for an awfully sweet girl! This was based on Abbie's GORGEOUS Navy Damask Wedding Cake. Similarly, I mixed square, hexagon, and round tiers. This time I used coral buttercream icing to stencil on top of a buttercream cake. I piped the monogram to look similar to the stencil on the second from the top tier & added various piped details on the sides. We used thin yellow satin ribbon at the base of each tier and sprinkled rose petals to give this one the “pop” that it needed. Isn’t it amazing how just changing the colors can make such an awesome difference?


Navy Damask Bridal Cakes

I was so excited when I was asked to do Abbie’s wedding cake! She was an absolute dream to work with. She basically let me do what I wanted to which is always the most fun for me! Her colors were navy blue and apple green. In the beginning, she thought she wanted a lot of piping with ribbon around the base, but it evolved into using the most wonderful stenciled damask cake I’ve had the opportunity of creating! I know I said the other one was my favorite, but that was before this even came close to entering my mind!


I combined square, hexagon, and round tiers to put together the shape of this beauty. The sides are stenciled with navy blue royal icing on top of a buttercream iced cake. I used the Elegant Cakes cartridge with my Cricut Cake to make the monogram from navy blue gumpaste. I’d finished the cake the night before the wedding but when I woke up the next morning, I decided to add the swirly piping to the top of each tier. I really think this took the cake from pretty to a little over the top – in a super good way! I hope you enjoy viewing the pictures!


I was also honored to make one of her bridal shower cakes. Again, I was just given the colors and was told to do whatever I wanted! I decided I wanted to use my Cricut Cake for this project. This is similar to the prior Cricut Cake post, but with a few differences, of course. I think if you look at my first attempt and this one, you can see I’ve come a long way. I used navy gumpaste for the damask design & then apple green buttercream for the solid side. I added what seems like my signature scrollwork to the sides because it just needed something to make it pop! The flower is also made of gumpaste.

Tuesday, March 27, 2012

Resignation Letter

Oh My Goodness! I finally did it! I turned in my "cake resignation letter" to my friends on Facebook! I've been playing with cakes for the past 4 years and although I've really enjoyed it, I am soooooooo tired of having my weekends and nights consumed by sugary art! I want to be able to go on last minute trips to the beach or to Atlanta for shopping or just be able to decide to work in the yard and not be punished with excessive sleepiness!  I have tons and tons of cakes to post here. I think I'll move them from Facebook, so people can use them for ideas or what not to do's. Now, I've just got to figure out how to categorize them.

Friday, March 16, 2012

Auburn Grooms Cake

This one was soooo much fun! I have been stuck doing Alabama cakes & finally got to do a team cake for a team I actually liked! This bad boy made it all the way to Auburn and the only damage was one small piece of "toilet paper" falling off the tree and drifting to the bottom of the cake. Super super fun! WAR EAGLE!

Hello Kitty Rainbow Cake!

I was lucky enough to get to make a Hello Kitty cake for the CUTEST little red headed sweetie you could ever be lucky enough to meet! I was a little concerned at first when she asked for Hello Kitty and Rainbows because hadn't seen one with rainbows that I liked online. So I came up with this. It's just a basic little 9 inch round cake with buttercream icing. The topper and "Kitty" are made from fondant, but the board is Skittles - you know, since they are a "rainbow of fruit flavor!" I was so pleased with how it turned out & then even more pleased when I found out how excited sweet Allison was when she saw it  and squealed, "Kitty Cake!!!!"

Hello Kitty Rainbow Cake
You can see more Hello Kitty Cakes here if you'd like :)

Sunday, February 26, 2012

Rustic Ruffles

I am absolutely in LOVE with the the cakes that Maggie Austin creates! I've drooled over them for ages but have been too scared to actually try to do a similar technique. Then one day she posted on Facebook asking her fans to ask questions they'd been wondering! I was so excited & a little scared that she wouldn't even attempt to give away her secret. But, she was super friendly and answered me! All it is is tons of fondant strips rolled out ridiculously thin!

Hmmm... I should be able to do that right? I have finally been given an opportunity to do a wedding cake using this technique! I am so excited & a little scared at the same time. No need to be scared though, all I have to do is practice right? I just had to find someone that would let me practice on them. This turned out to be a bit more difficult in the world of peace signs and zebra print requests.

I'd been waiting since September for the opportunity (since I don't eat cake myself) & was finally presented with the PERFECT opportunity this weekend! A baby shower for a little girl with a woodland creature theme! So, here's my first attempt at doing the paper thin, rustic ruffles.

Closeup of top tier


Closeup of birdnest topper

The full cake
~Thanks for looking~ 

Thursday, February 17, 2011

First Big Cricut Cake Project

As soon as I heard about the Cricut Cake machine last January, I knew I HAD to have one! They didn't go on sale until May though, so I waited, impatiently waited, for this wonder machine to become available...I stayed up until midnight the night before the Home Shopping Network offered them and bought it as quick as I could!
I tried it the day I got it and took it out of the box...unfortunately, it was a little trickier than expected. I tried fondant paisleys for a little birthday cake box...they worked a little, but not nearly as wonderfully as I'd hoped. I wasn't ready to give up yet though. I blamed it on the thickness of my fondant...surely that was the problem.
Next project - my nephew's awesome 13th birthday soccer cake! Surely I could make awesome things this time. Maybe I just need to use the icing sheets that came with the machine? Yeah - those didn't work so well AT ALL! But I was in a hurry and didn't really have as much time as I wanted to make it spectacular. So, I still didn't give up!
Over the next few months I "played" with it here and there - a name on a groom's cake, some butterflies on something else, even tried another soccer cake. I got more comfortable with it, but still not so comfortable that I could count on it. At the beginning of January, I was bound and determined to get the thing to work for me! I studied online blogs about what worked best for others and tried their suggestions. I had a cake opportunity that would be beautiful if I could make it happen. Would it work when I really needed it?
First try - mix tylose with fondant (store-bought black - duff's brand), roll it out and freeze for 1 hour. This cut beautifully, however, I couldn't get the pieces off without destroying them. Never fear, I have another "practice night" before I have to resort to a very cramped hand from all the piping I'd have to do if I couldn't get it to work.
Next attempt - mix black fondant, gumpaste, and some extra tylose and black gel coloring. Rolled it out very thin. Heavily loaded the mat with crisco (well more than I had in the past). I added the rolled out fondant to the mat and hit cut!!! I watched as it cut each piece close to perfection....but is it going to come off the mat? OMG it worked! I have all these pieces still intact! It worked it really worked!
After several more cuts for the decorations, I was ready to decorate the cake. I was pretty happy with the results :-) Can't wait for my next opportunity to use it!

Tuesday, February 1, 2011

Fiesta

Topsy turvy fiesta! Three tiered cake made from 2 8 inch, 2 6 inch, and 2 4 inch round cake layers carved into the shapes, covered in fondant and then stacked.

No matter how often you make one or how confident you are in stablizing the cake, there is always the chance of a cake disaster. I didn't find out until 3 days after the party that this one didn't make it to the party as it looks in this picture. Apparently grandma took a turn too quickly and it toppled over :(

Monday, January 24, 2011

My favorite favorite wedding cake ever!


Or at least so far! My friend sent me a picture of this cake and said it was perfect for her daughter. I was a little concerned since i'd never used the icing strips before, but they turned out to be wonderful! They look like a million bucks and were so easy to work with! woohoo!

Sweet 16 Topsy Turvy...


So, I knew going into it this was going to be a very large cake. I didn't realize it was going to consume over 12 hours of my time! I worked on it for 2 nights... after the first night i thought surely this would be the cake from hell!!!!  But after a good night's sleep and dinner with friends, it turned into a masterpiece!


Buttercream covered cake with fondant accents. Fed between 80 & 100 ppl!

Tuesday, January 18, 2011

Penguin Topsy Turvy Cake

Okay! Here's the day we've been waiting on! Well at least the day i've been waiting on! It's the day of the infamous Penguin Party! Woot Woot!


I made the invitations, I made the goodie bags, of course I made the cake! It all made it 100 miles from my driveway and the kids had a blast roller skating... Apparently, the area had been iced in for over a week and everybody in the 50 mile radius decided to bring their kids skating that day. It was a madhouse so I didn't quite get to try out any new photo techniques in the rink, but I did snap a couple of pics of the cake before I left to share.

The cake is a 3 tier, topsy turvy style cake. I covered each tier in homemade marshmallow fondant and airbrushed it in blue. The snow capping each tier is smoothed buttercream. The igloo topper is made from rice krispie treats and fondant. The penguins are also made from fondant. I modeled mine after one of the cakes I saw on the pinkcakebox website - i can only hope to be as good as her one day!


Thanks for looking! PaRTy LiKe a PeNGuiN!

Pink & Green First birthday Cake


Oh yay! It's almost a super special girl's very first birthday! She's super girly with favorite colors of pink and green. What goes best with these colors? a giant bow and some dainty ballerina slippers!

This cake is covered in pink vanilla buttercream, with mainly buttercream accents. The bow and little slippers are made from a fondant/gumpaste mix.

Iron Man Cake


Iron Man cake! I covered the cake with buttercream icing and then airbrushed the background. Iron Man's face & the lettering is piped on the sides of the cake. The topper is made from a fondant/gumpaste mixture.